How to create a discord bot & token

What is a Discord Bot Token?
A Discord Bot Token is a short phrase that acts as a “key” to controlling a Discord Bot. Tokens are used inside bot code to send commands back and forth to the API, which in turn controls bot actions.
Generating Your Token Step-by-Step
1. Go to the Discord Developer Portal
Your first step is to browse over to the Discord Developer Portal: https://discordapp.com/developers/applications/
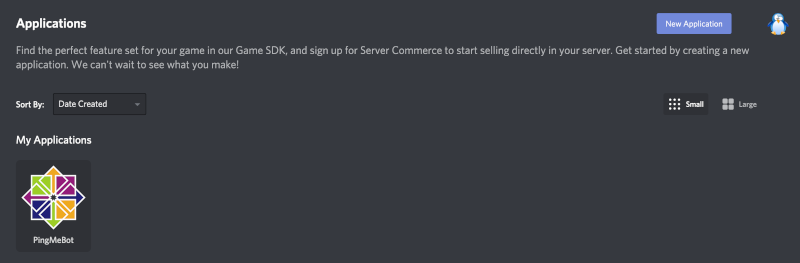
This portal shows all of your applications and bots.
If you already have a bot created, click it in the list. If you don’t have any discord bots, click the “New Application” button.
2. Give Your Application a Name
Here you’ll be prompted to give your application a name.
You’re likely making a Discord Bot here, or you need your token for a Discord Bot. If this is true, then think about what you want your bot to be named and enter it here.
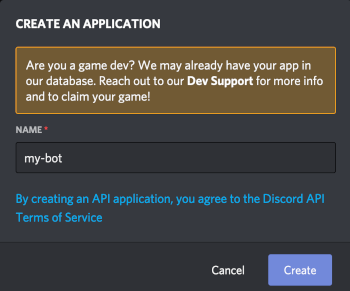
You can also provide description and upload picture after clicking Create
3. Retrieve Your Token
Your next step is to go over the menu on the left side of the screen and click “Bot”. It’s the icon that looks like a little puzzle piece.

Click the “Yes, do it! ” button…
You’ll see a green message, “A wild bot has appeared!”
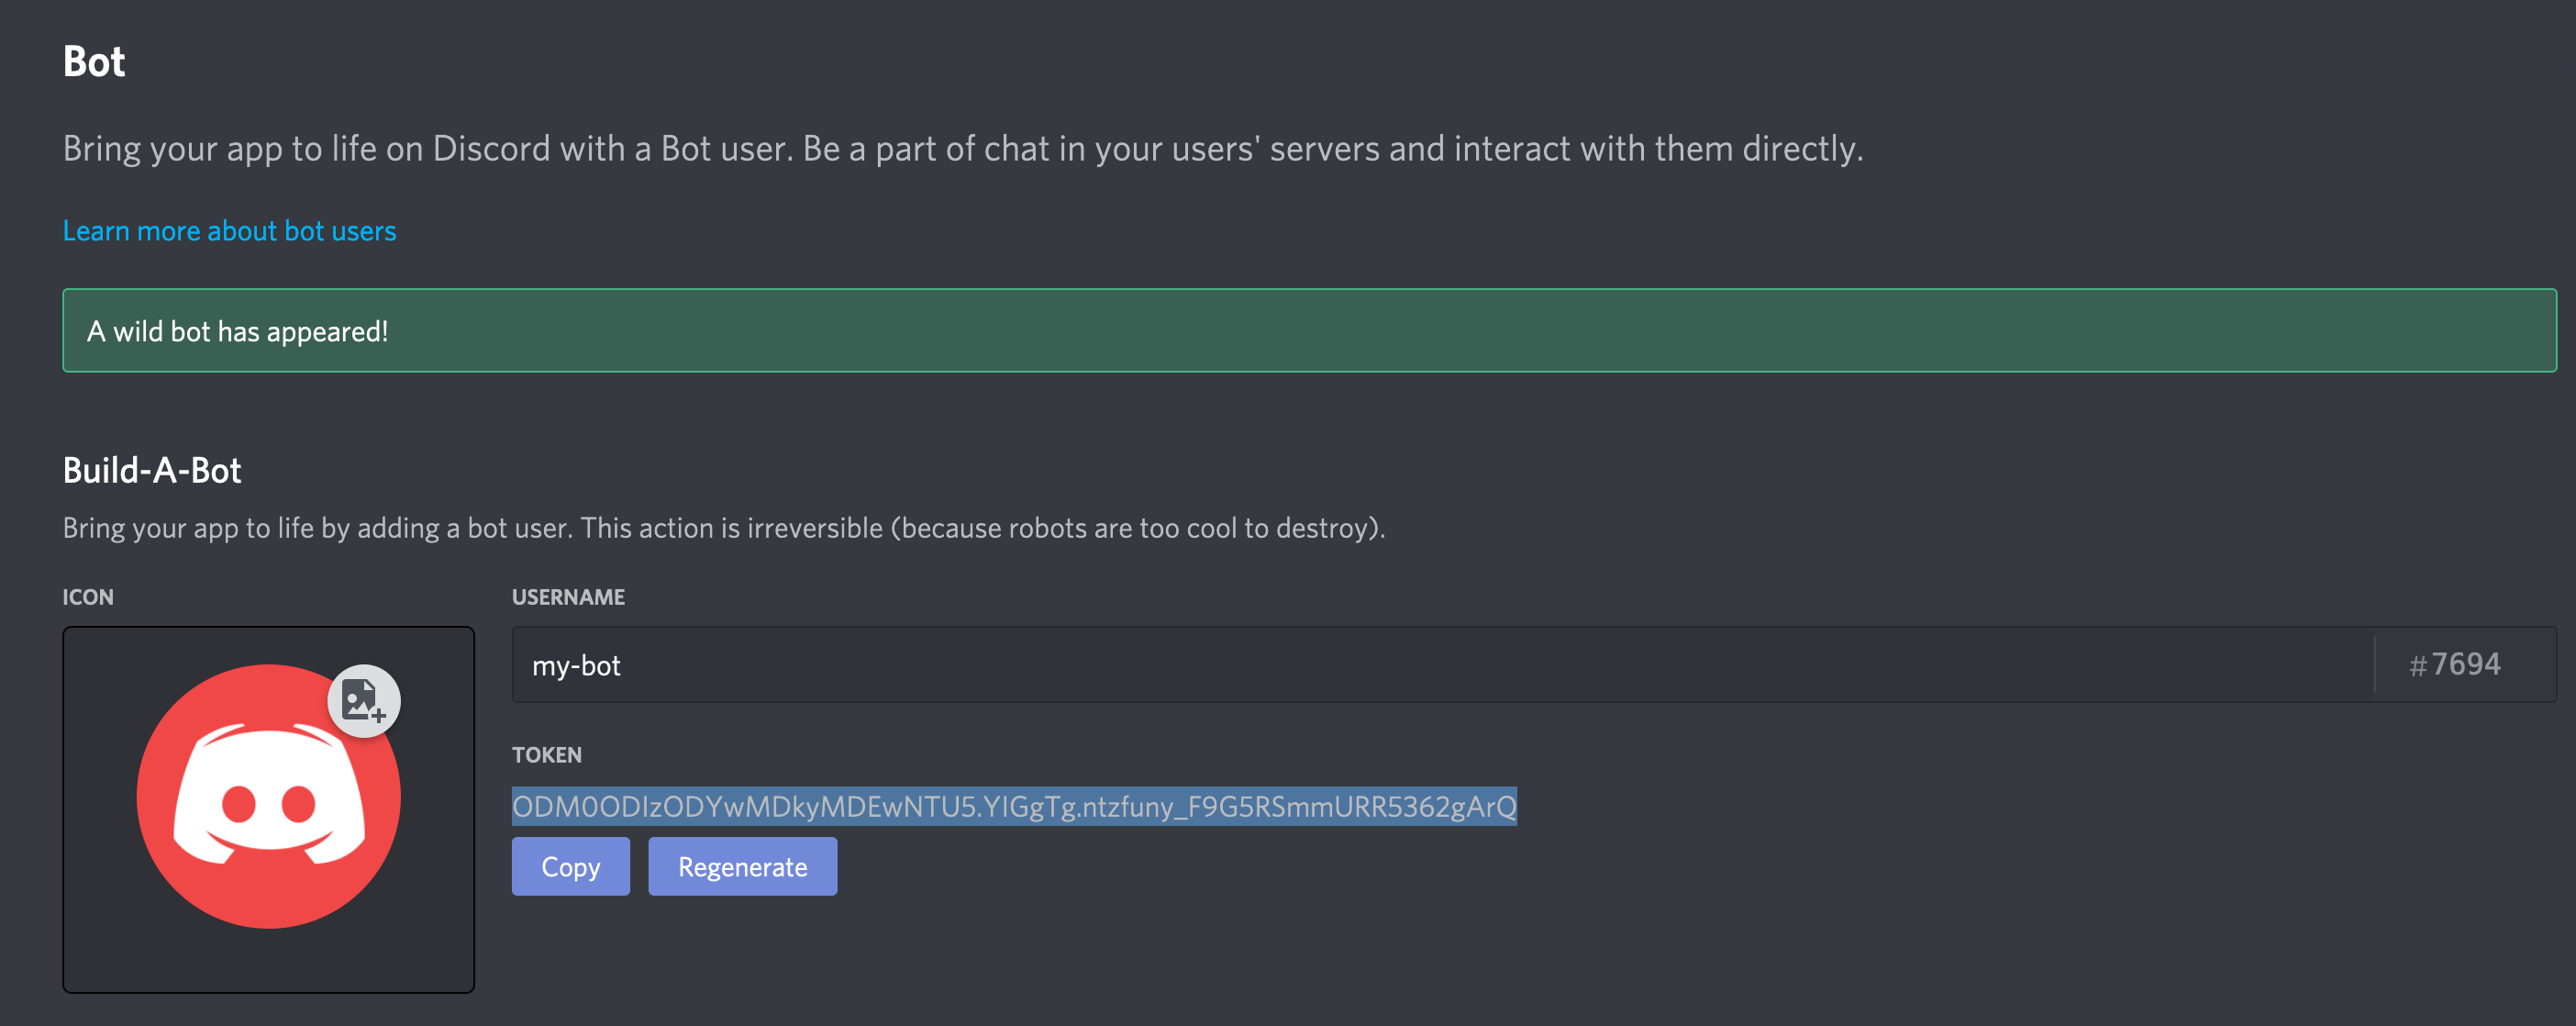
You’ll also see a “Token” and a blue link you can click called “Click to Reveal Token”
As soon as you click this link, your token will be revealed…
And that’s it! You have your token!
Add your bot into your Discord Server.
1. Add Your Bot to a Discord Server
In order to add your bot to your Discord Server, you’ll need to navigate back to the “OAuth2” tab.
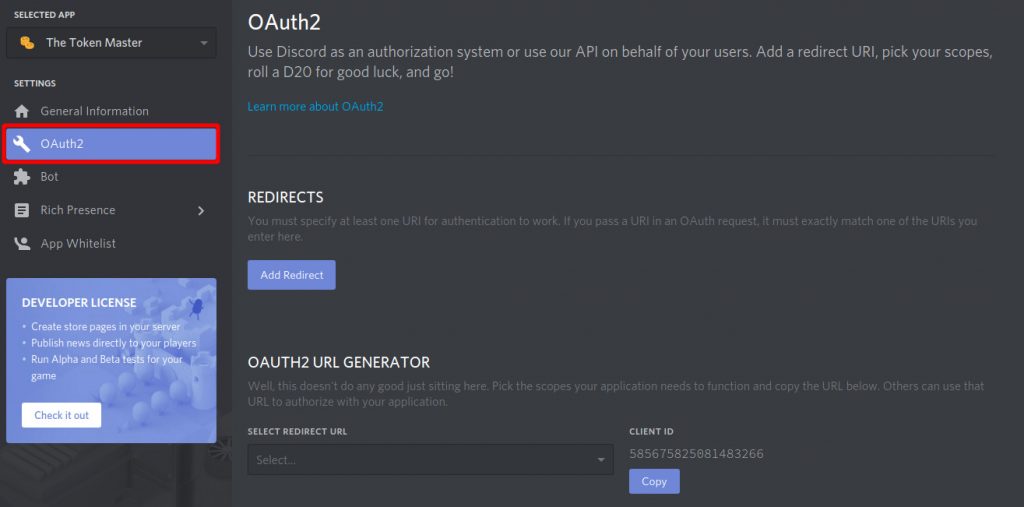
Once there, scroll down to the “Oauth2 URL Generator” section. In the “Scopes” section, you’ll want to select the “bot” checkbox.
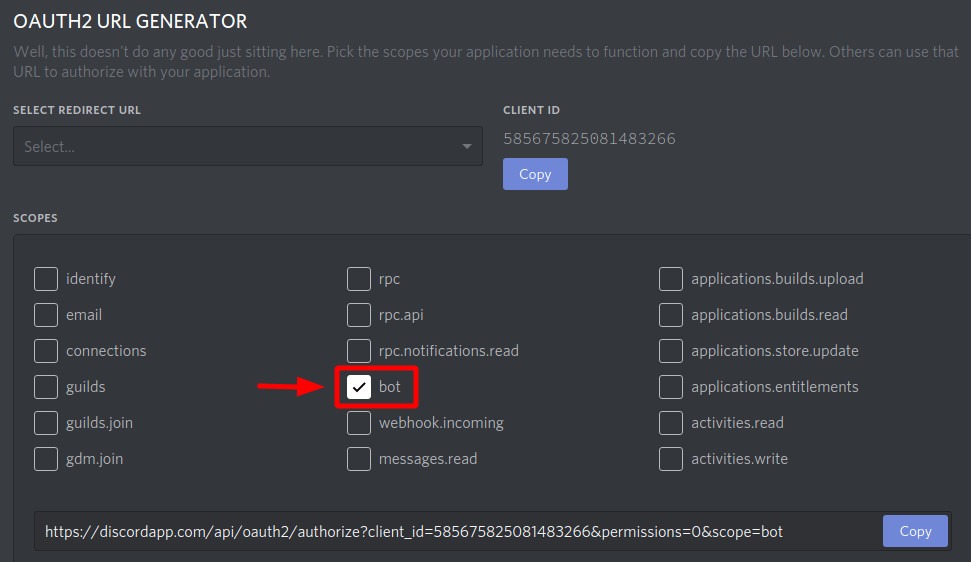
You’ll notice that a URL appeared as soon as you clicked “bot” — this will be your URL for adding your bot to a server.
But we’re not quite there yet!
Scroll down some more to the “Bot Permissions” section. This is where you choose what permissions to give your bot, and what it can and can’t do.
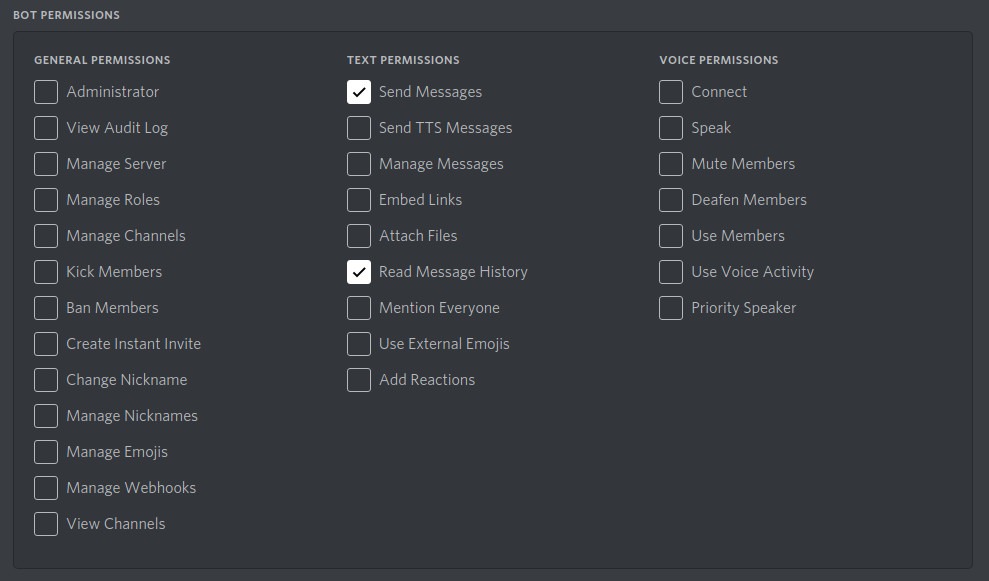
Based on what type of bot you’re planning on building, you’ll want to select permissions that most closely match what it’ll be doing day-to-day.
Important: Do not select all of the permissions “just to make things easy”. Only give your bot the permissions it really needs.
After you’ve selected your permissions, scroll up a little bit and look at the URL that was generated.

Click the “Copy” button on the right side. This is the URL you’ll navigate to in order to add your bot to a server.
Go to that URL and you’ll see a page that looks sort of like this (see below). Here you’ll want to select the server you’re adding your bot to, double-check the permissions you’re giving your bot, and then continue to the next step.
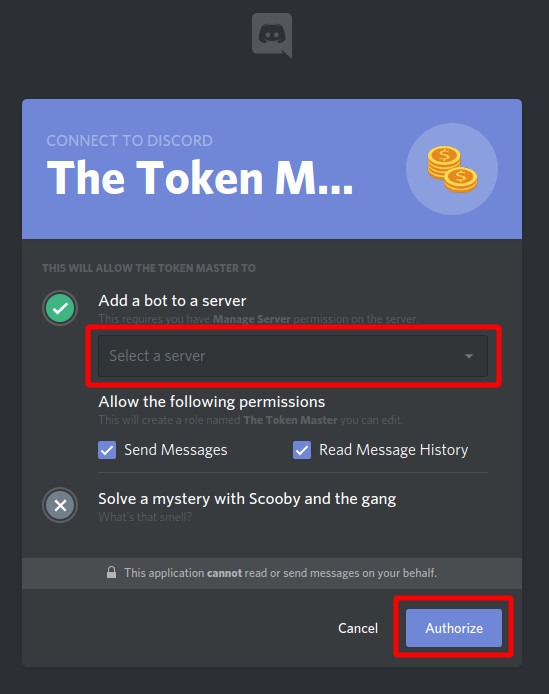
You’ll likely get an “I’m not a robot” captcha message on the next screen. Solve the captcha and continue.